Showing posts with label Sewing. Show all posts

Monday, 28 March 2016

Alpaca My Bags! Lined Tote Bag Tutorial

This is a project I worked on before Christmas but hadn't gotten around to writing up.  Please excuse the quality of the photos…the light at that time of year made photographing as I went along tricky! I bought half a metre of this black & white, cotton canvas alpaca fabric from a shop called Nomura Tailor in Kyoto when we were in Japan last July with the intention of making a tote bag out of it as a Christmas present for my brother.

© 2016 Jennifer Richardson
To make a similar lined tote bag with a pocket, you will need half a metre of your main fabric…something like cotton canvas works well as it is pretty hard-wearing, but I have also made one of these bags from a shirt.  You will also need half a metre of lining fabric…I used a polycotton lining that I picked up in Dunelm. To make the bag:
  1. Cut 2 rectangles from your main fabric and 2 rectangles from your lining fabric measuring approximately 17” wide by 19” high.
  2. Cut a 2” square from each lower corner of both the main fabric and lining rectangles.
  3. With half a metre of fabric you may not have quite enough to cut the straps as one continuous length. I therefore cut 4 strips measuring approximately 16” long by 2.5” wide from the main fabric and 4 strips from the lining fabric, which I then pieced together to form 2 long strips of the main fabric and 2 long strips of the lining fabric.
  4. For the pocket, cut a 17” wide by approximately 10” high rectangle from the lining fabric.
© 2016 Jennifer Richardson
  1. This step is optional, but if you have an overlocker you may wish to overlock all your raw edges to prevent fraying.
  2. Take the pocket rectangle and fold over the top edge by 1cm and press. Fold over again by another 1cm and press.  Now stitch along this top edge.
  3. On a flat surface, place the pocket rectangle on top of one of the lining rectangles where you would like the pocket to be positioned. I positioned mine roughly halfway between the top and the bottom of the lining piece.  Then fold the pocket rectangle forward so that the pocket is upside down with right-sides together and the bottom edge of the pocket is still lined up with where you want the bottom of your pocket to be and pin in place.  Now stitch along the bottom edge.  Fold the pocket back up and press along the bottom seam.
  4. If you wish you can add sections to your pocket. Here I have created 3 sections of different sizes to hold things like a notepad, pen & phone.  To do this I placed a row of pins where I wanted to stitch to create the sections and then stitch as straight as I could following the pins. 
    © 2016 Jennifer Richardson
  5. Take the 2 rectangles of main fabric and with right-sides facing, stitch the side seams and bottom seams leaving the 2” corners open. Do the same for the lining.  I used at 1.5cm seam allowance.  Press seams open. 
    © 2016 Jennifer Richardson
  6. To finish the corners and create the base of the bag, line the side seam and bottom seam up and then stitch across.
    © 2016 Jennifer Richardson
  7. Put the main fabric bag inside the lining fabric bag so that right-sides are facing and lining up the side seams. Stitch around the top of the bag leaving an opening big enough to turn the bag right-side out.
  8. Once you’ve turned the bag the right-side out, push the lining inside the main fabric. Press around the top of the bag and then top stitch all the way round.  I used a twin needle to do this.
© 2016 Jennifer Richardson
  1. To create the straps, piece together the 4 strips of main fabric and 4 strips of lining fabric to create 2 long strips of the main fabric and 2 longs strips of the lining fabric.
  2. Fold over the raw edge on both long sides of each strip by ½” and press. Your strips will now be approximately 1.5” wide.
  3. With wrong-sides together pin and stitch 1 strip of main fabric to 1 strip of lining fabric. And do the same with the remaining 2 strips.  I used my twin needle to top stitch down each side of the strap.
  4. Finally, position the straps where you want them to be on your bag and pin in place. Stitch the straps to the bag.
© 2016 Jennifer Richardson
I finished my bag off with a free machine embroidered tag reading “Alpaca My Bags” :-)

© 2016 Jennifer Richardson
This is a variation I made, also for my brother.  For this I picked up a shirt in Primark for £3 and refashioned it into a bag!

© 2016 Jennifer Richardson

Monday, 21 March 2016

Stripy Emmeline Tee

This is the second Emmeline Tee I have made. The first one I made as a secret Santa gift for a friend, which I wrote about here. But this one I have made for myself :-)

The Emmeline Tee pattern includes 3 versions all of which can be made in woven or knit fabrics, detailed instructions for which are included. I made version 3 for my first attempt at the Emmeline, but this time I decided to make version 1 with the kimono sleeves and turned up cuffs. As with version 3 of the pattern, version 1 only has 3 pattern pieces (front, back, and neckband) so it is pretty quick to cut out the fabric. I cut out a size S, but lengthened it by a good 2 inches. When I made my first Emmeline Tee I found that it only just sat on the top of my jeans waistband. It drives me mad when I have to keep tugging tops down all the time, so for me I wanted to make sure it had enough length in the body that I wouldn't have to do that.

© 2016 Jennifer Richardson
The fabric I used was a black and white striped jersey with a metallic silver thread running through it. I bought it from Stuarts Fabrics on Leicester market for something like £4 per metre. I didn't really pay any attention to what the composition of the fabric was. I tend to buy fabric by how it looks and feels as opposed to paying much attention to what it says on the label (besides the price) and when buying off the market there aren't really any labels attached to the fabrics so I never really know exactly what I'm buying! But with Stuarts Fabrics a lot of the fabrics have been used by retailers and therefore tend to be reasonable quality. The fabric I bought is lightweight jersey and feels nice and soft so works well for a t-shirt.

© 2016 Jennifer Richardson
I started by overlocking all the raw edges of my pattern pieces apart from the neckline. Then it was just a case of sewing the front and back together at the shoulder seams and then up the side seams, attaching the neckband and finishing the hems using a twin needle. For the sleeve cuffs the instructions tell you to hand-stitch these in place. However, I'm not terribly patient when it comes to hand stitching so I finished those by top stitching with a twin needle too! As a finishing touch I added 2 buttons to the cuffs. I found these buttons in John Lewis and thought they were pretty and would finish my t-shirt off nicely. I like them, but my husband thinks they stick up too much!

© 2016 Jennifer Richardson
I was really pleased with the finished result and once again I found the pattern straightforward to follow so I managed to make this t-shirt up in an evening after work! I tried to match the stripes up at the side seams…something you’d think wouldn't be too tricky to do with stripes. In some places I was successful, in other places not so! But the main thing is that the stripes run horizontal and I was very pleased with the stripes around the neckline and neckband.

Monday, 7 March 2016

Free Machine Embroidery Workshop

Back in November two of my crafting friends and I booked on to the free machine embroidery workshop at The Craft Studio in Nottingham for February to give ourselves something to look forward to post Christmas. At the time it felt like it was ages away, but a couple of weeks ago we finally got to go on it!

I first used free machine embroidery on my fashion textiles course back at college years ago to stitch things like trees and leaves and have also free machine embroidered the odd gift card. Most recently I have free machine embroidered on top of some custom printed map fabric, which I wrote about here. But I had never really incorporated different bits of fabrics into a design to create more of a picture or scene. So this was what I was hoping to gain some tips for doing and despite not being completely new to free machine embroidery I still learnt plenty of new tips from Clare at The Craft Studio that I will certainly be putting into practice to do more free machine embroidery in the future. I always used to blame my old machine having a side loading bobbin for the cause of jamming and getting the bird’s nest of thread, but it would seem this was not always necessarily the culprit!

With just 7 people in the class there was a nice, friendly atmosphere. Clare’s instruction was always clear and informative. Clare started us off just doing some simple doodling on to a piece of calico in order to get everyone used to moving the fabric around. We were supposed to just practice going in circles, but I got carried away and started drawing a kite!

Next we moved on to tracing shapes and drew 4 shapes (a square, a circle, a heart, & a triangle) onto a piece of calico with a pencil and then attempted to follow the outlines on the machine.

We then moved on to more complex shapes and tried drawing the outline of a bird and a flower before taking the same shapes and looking at how to applique fabric into the design.

© 2016 Jennifer Richardson
After we had worked through these tasks to gain some confidence we were able to start on our own project of our choosing. I had done quite a bit of looking on Pinterest for inspiration so had found a few ideas, but one of my favourites was a picture of a robin someone had done using different bits of fabric and outlined in a sketchy way with the stitching. So I decided I wanted to attempt to do a similar robin and liked the idea of sitting him on top of a spade handle. After rummaging through Clare’s scrap fabric bags to find some suitable bits of fabric for my robin I set about drawing out my design and cutting everything out. I attached my design to a calico tote bag and I was pretty pleased with the result. I must have been concentrating so hard trying to ensure I finished my design before I left that I was completely wiped out by the time I got home!

© 2016 Jennifer Richardson
At the end of the workshop we were able to look around The Craft Studio shop and we all stocked up on supplies to get us set up with free machine embroidery at home. We had such a fun day and I would highly recommend doing a workshop at The Craft Studio if you get the chance. 

Last week I put my new skills into practice to make this Mother’s Day card for my Mum, which she loved :-)

© 2016 Jennifer Richardson


Monday, 29 February 2016

Growing Sewing Pattern Collection

A few days ago I received the Simplicity New Look newsletter informing me that New Look sewing patterns were currently half price on their website. This ignited a conflict in my head with one voice telling me I have enough sewing patterns and the other voice was shouting over the top that they’re on sale! My sewing pattern collection is growing quite large now and I have yet to make up most of them. But I love a sale and at £2.98 a pattern the sale voice won and I caved in to buying 5 new patterns to add to my collection.

© 2016 Jennifer Richardson

1. New Look 6322:
This is probably my favourite of the 5. I fell in love with the neckline of view C & D and the pleats on the bust. I also like that it can be made up in both woven fabrics and knits. I didn’t feel I had anything with a similar neckline already and further justified it as I thought it may work for some fabric I bought back from Japan last July!

2. New Look 6000:

This pattern reminded me a little of the Sew Over It Joan dress (I think its the neckline of views B, C & D), which I already have and have yet to make. But, like 6322, I liked that it can be made in both woven fabrics and knits and hence it made it into my basket! I also liked the side ruching.

3. New Look 6150:
I liked the ruched sleeves and neckline of view B and have a fabric that I thought might work for this.

4. New Look 6409:
This pattern I bought with my niece in mind who is nearly 2. It is a very basic skirt pattern so not one I would buy full price. But at half price I thought it was worth having so I can hopefully whip up some skirts when she’s a little bit older without have to use my brain too much.

5. New Look 6872:
Again this is a basic skirt pattern I wouldn’t have bought full price. I have some fabric my Mum bought me back from Japan that I have been meaning to make into a skirt like this and was going to try and do it without a pattern. However, for £2.98 I thought it was worth just buying it and I liked that this one comes into the waist as opposed to being designed to sit lower.

I have started keeping a record of the patterns I own using a Pinterest board so I can easily see what I have and therefore when I am looking at patterns I can better judge where I may have gaps! But perhaps I should also unsubscribe from receiving newsletters informing me of sales so I’m not tempted to keep buying more patterns before doing something with the ones I already have! And don’t get me started on fabric…

Thursday, 4 February 2016

“I make things with my bear hands” Emmeline Tee

When I drew my friend Jen in our work secret Santa draw my immediate reaction was “YEEEEEEEEESSSSSSSS”. Jen is a fellow crafter and my initial thought was that she would be easy to buy a gift for. But then when I thought about it I realised I wanted to make sure I did something really good. I knew she would be more than happy if I just bought her some fabric, but at the end of the day that wouldn’t require much effort and she can buy herself fabric anytime. So I started thinking of what else I could do. Jen is known as ‘The Bear’. I remembered a t-shirt I had seen in Asda ages ago that had a bear on it holding tools and it read ‘I fix things with my bear hands’. And it got me thinking whether I could make her a similar t-shirt, but craft themed to read ‘I make things with my bear hands’ instead. Of course I decided that I couldn’t just buy a plain t-shirt to print on, but instead needed to make one from scratch.

I love The Little Tailoress blog and had been looking for an excuse to purchase the Emmeline Tee pattern for some time, but had been trying to resist as I have so many sewing patterns that I have yet to do anything with. But I felt making a t-shirt for Jen gave me the perfect excuse to add this pattern to my collection.

I purchased the PDF version of the pattern. PDF patterns can be a faff to stick together, but then so is tracing a paper pattern, which I try to make myself do so I always have the original to go back to. I do quite like PDF patterns for the reason that you always have a permanent copy that you can print as many times as you like. So if you need a different size, ruin a copy, or want to make any modifications you can just print another copy. Plus, in printing on paper your pattern is more robust than tracing paper.

The Emmeline Tee pattern includes 3 versions all of which can be made in woven or knit fabrics, detailed instructions for which are included. I decided to make version 3 using a grey marl t-shirt jersey I picked up from Lili Fabrics stand at the Stitching, Sewing & Hobbycrafts show at the NEC, Birmingham in November.

Version 3 of the pattern only has 3 pattern pieces (front, back, and neckband). So it was super quick to cut out the fabric. I cut out a size S for Jen, but to the largest size on the hem to give a tiny bit of extra length in the body. When I come to make myself an Emmeline Tee I think I would want a bit more length in the body so will have to lengthen the pattern.

Following the instructions I started by overlocking all the raw edges of my pattern pieces. Then it was just a case of sewing up the side seams, attaching the neckband and finishing the hems and edges using a twin needle. The pattern is so clear and straightforward that it makes up in next to no time.

I enlisted the help of my husband Steve for the design to go on the front as he is very good at graphical stuff and design. So I told him what I wanted and he put it together for me.

Once the t-shirt was made up, next thing I had to try and figure out was how to get it printed. I did quite a lot of research into the various methods of printing. The cheapest is to buy an iron-on transfer. There are many websites that allow you to upload your own design and they will post you the transfer for you to iron onto your t-shirt yourself at home. However, I read that iron-on transfers aren’t really made to last and can perhaps only withstand 4-5 washes. I wanted Jen’s t-shirt to be more durable than this so I looked into other options. I decided that what I wanted was direct to garment printing so set about trying to find somewhere that would be willing to print on my own t-shirt rather than one of theirs. Fortunately I found ExampleUK who happen to be based just a couple of miles away from where I live. They were more than happy to do a one-off print using my design and t-shirt and I was so pleased with the result. I think it looks so professional.

I was soooooo excited about giving my secret Santa gift. I knew Jen would probably guess I was her secret Santa straight away, but I didn’t care as I was just dying to know what she thought of it and she loved it!

Here is the finished article:

© 2016 Jennifer Richardson
I am looking forward to making myself a few versions of the Emmeline Tee and already have fabric lines up to make about 3-4 different versions!


Thursday, 10 December 2015

Alternative Christmas cards:

I’ve always wondered when I make handmade cards whether people hold on to them or whether they just end up in the recycling with the rest. Of course I don’t expect people to hang on to everything, but when you put effort into making things its sometimes hard to think that they may just find themselves in a bin. So, a few years ago I decided to make what I call ‘alternative’ Christmas cards in the hope that people would be more likely to hold on to them. My alternative cards are generally some form of tree decoration. Of course, not being flat means postage is more expensive as they generally have to be sent with large letter stamps, but I like thinking that all the people on my Christmas card list are essentially getting a small gift.

Over the past few years I have made felt Christmas puddings, felt Christmas trees, fabric presents, crochet stars, and knitted mini stockings. Here are a few examples of ones I’ve kept hold of for my own Christmas tree:

© 2015 Jennifer Richardson
For this year’s cards I have been making fabric yoyo Christmas wreaths. I bought all the supplies from eBay. I’ve used red beads and the cutest mini red buttons to look like berries and red satin ribbon for the bows and hanging loop. I’m pretty pleased with how they have turned out so I hope their recipients will like them also.

© 2015 Jennifer Richardson

Monday, 9 November 2015

maps, maps, maps

We have a bit of an obsession with maps in our household.  We both did degrees in Geography followed by a masters in Geographical Information Systems so maps are a big part of what we do.  We have a number of framed maps hung on our walls along with various other map themed objects.  And, of course, whenever I see map fabric I really struggle to not buy some.


My latest map fabric purchase was bought in a fabric shop we stumbled across whilst staying in Kumamoto on a recent visit to Japan and is a half metre piece of heavyweight cotton with a Japanese style map on it:

Japanese map fabric from Kumamoto, Japan. © 2015 Jennifer Richardson


I haven’t decided what to use this bit of fabric for yet, but it will most likely be turned into a cushion cover as much of my other map fabric has been!

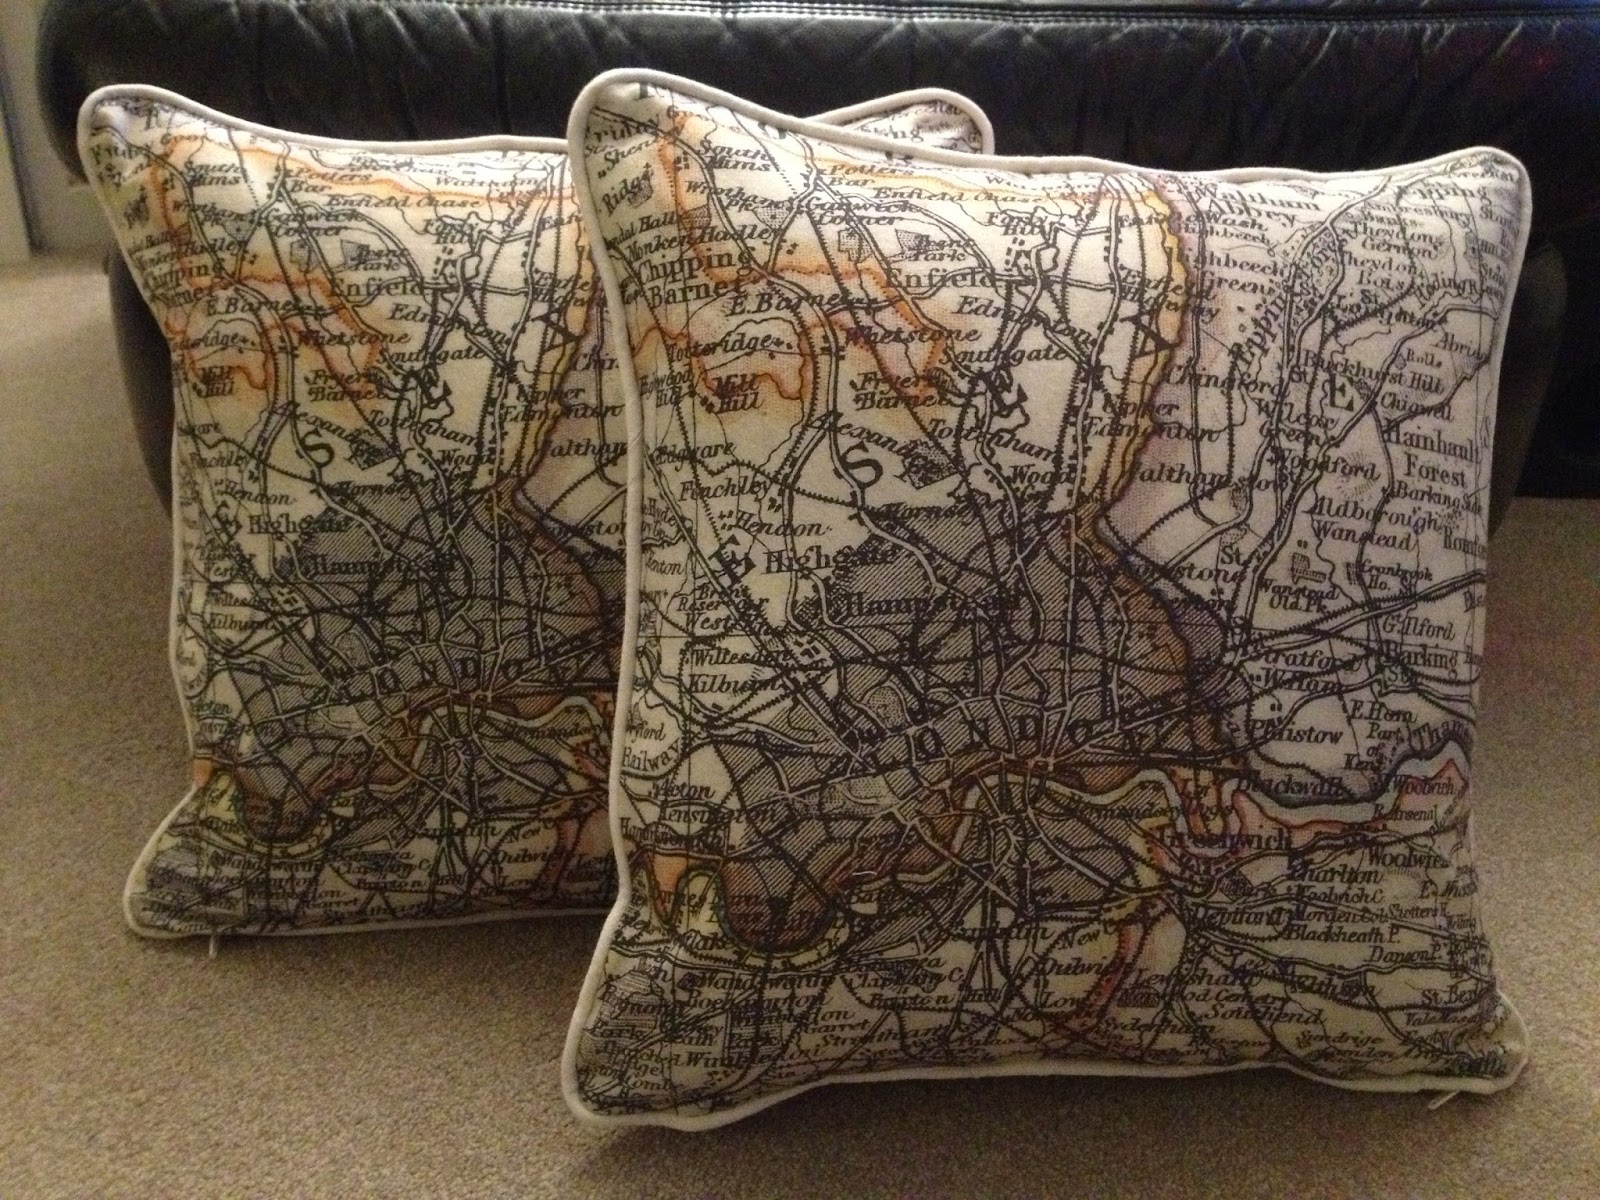
I made these cushions as a present for my younger brother and his fiancé who live in London using fabric I bought on Leicester market:

London map cushions. © 2015 Jennifer Richardson

These cushions were a housewarming present for a friend who is a fellow map fan:
Map cushions. © 2015 Jennifer Richardson

I also used some of the map fabric to redo the cushion pads on our dining room chairs:


Map seat cushion. © 2015 Jennifer Richardson
But by far my most favourite map themed project to date was to get some map fabric custom printed.  I came across Fingerprint at a craft show at the NEC in Birmingham a while ago.  What attracted me to their stand were the squares of map fabric printed using images from old atlases.  I just could not walk past that stand without taking a look and of course ended up buying a few squares which I made into cushion covers as a present for my older brother:
World map cushions. © 2015 Jennifer Richardson

London map cushions. © 2015 Jennifer Richardson

Whilst at the stand I ended up chatting to Laura Kemshall’s mum who told me about the custom printing.  Once I knew what I wanted, I contacted Laura and sent through my images.  Laura was really lovely to communicate with and I was absolutely delighted with my fabric when it arrived.  I had a half metre printed, which had 3 map squares on that I had lined up to make (yes, you guessed it) more cushion covers.  These were going to be special cushion covers though as my plan was to freehand embroider over some of the line work such as contours, rivers, main roads and stands of trees.  One of the cushions I then gave as a wedding present and the others (though I still haven’t finished the 3rd) were for my Mum for her 60th.  I was over-the-moon with the final result.  And I keep meaning to get more map fabric custom printed by Fingerprint!
Please note that if you are thinking about having any fabric custom printed then you need to make sure that any images you use are out of copyright.

Custom printed map cushion freehand machine embroidered. © 2015 Jennifer Richardson