Showing posts with label Fabric. Show all posts

Monday, 28 March 2016

Alpaca My Bags! Lined Tote Bag Tutorial

This is a project I worked on before Christmas but hadn't gotten around to writing up.  Please excuse the quality of the photos…the light at that time of year made photographing as I went along tricky! I bought half a metre of this black & white, cotton canvas alpaca fabric from a shop called Nomura Tailor in Kyoto when we were in Japan last July with the intention of making a tote bag out of it as a Christmas present for my brother.

© 2016 Jennifer Richardson
To make a similar lined tote bag with a pocket, you will need half a metre of your main fabric…something like cotton canvas works well as it is pretty hard-wearing, but I have also made one of these bags from a shirt.  You will also need half a metre of lining fabric…I used a polycotton lining that I picked up in Dunelm. To make the bag:
  1. Cut 2 rectangles from your main fabric and 2 rectangles from your lining fabric measuring approximately 17” wide by 19” high.
  2. Cut a 2” square from each lower corner of both the main fabric and lining rectangles.
  3. With half a metre of fabric you may not have quite enough to cut the straps as one continuous length. I therefore cut 4 strips measuring approximately 16” long by 2.5” wide from the main fabric and 4 strips from the lining fabric, which I then pieced together to form 2 long strips of the main fabric and 2 long strips of the lining fabric.
  4. For the pocket, cut a 17” wide by approximately 10” high rectangle from the lining fabric.
© 2016 Jennifer Richardson
  1. This step is optional, but if you have an overlocker you may wish to overlock all your raw edges to prevent fraying.
  2. Take the pocket rectangle and fold over the top edge by 1cm and press. Fold over again by another 1cm and press.  Now stitch along this top edge.
  3. On a flat surface, place the pocket rectangle on top of one of the lining rectangles where you would like the pocket to be positioned. I positioned mine roughly halfway between the top and the bottom of the lining piece.  Then fold the pocket rectangle forward so that the pocket is upside down with right-sides together and the bottom edge of the pocket is still lined up with where you want the bottom of your pocket to be and pin in place.  Now stitch along the bottom edge.  Fold the pocket back up and press along the bottom seam.
  4. If you wish you can add sections to your pocket. Here I have created 3 sections of different sizes to hold things like a notepad, pen & phone.  To do this I placed a row of pins where I wanted to stitch to create the sections and then stitch as straight as I could following the pins. 
    © 2016 Jennifer Richardson
  5. Take the 2 rectangles of main fabric and with right-sides facing, stitch the side seams and bottom seams leaving the 2” corners open. Do the same for the lining.  I used at 1.5cm seam allowance.  Press seams open. 
    © 2016 Jennifer Richardson
  6. To finish the corners and create the base of the bag, line the side seam and bottom seam up and then stitch across.
    © 2016 Jennifer Richardson
  7. Put the main fabric bag inside the lining fabric bag so that right-sides are facing and lining up the side seams. Stitch around the top of the bag leaving an opening big enough to turn the bag right-side out.
  8. Once you’ve turned the bag the right-side out, push the lining inside the main fabric. Press around the top of the bag and then top stitch all the way round.  I used a twin needle to do this.
© 2016 Jennifer Richardson
  1. To create the straps, piece together the 4 strips of main fabric and 4 strips of lining fabric to create 2 long strips of the main fabric and 2 longs strips of the lining fabric.
  2. Fold over the raw edge on both long sides of each strip by ½” and press. Your strips will now be approximately 1.5” wide.
  3. With wrong-sides together pin and stitch 1 strip of main fabric to 1 strip of lining fabric. And do the same with the remaining 2 strips.  I used my twin needle to top stitch down each side of the strap.
  4. Finally, position the straps where you want them to be on your bag and pin in place. Stitch the straps to the bag.
© 2016 Jennifer Richardson
I finished my bag off with a free machine embroidered tag reading “Alpaca My Bags” :-)

© 2016 Jennifer Richardson
This is a variation I made, also for my brother.  For this I picked up a shirt in Primark for £3 and refashioned it into a bag!

© 2016 Jennifer Richardson

Friday, 25 March 2016

Sewing For Pleasure, NEC

Last weekend I visited the Sewing For Pleasure show at the NEC with my Mum. We bought our tickets through Tesco Clubcard for a bargain £3! And the tickets not only gain you entrance to the Sewing For Pleasure show, but also Hobbycrafts, Fashion & Embroidery, and Cake International.

I love visiting the big sewing shows at the NEC. They are a great way to stock up on sewing and craft supplies and gather inspiration. Even if you don’t buy anything (which in my opinion is virtually impossible) it is a great day out and is a great opportunity to browse and feel the variety of fabrics in a way you just can’t do online. I love being able to buy from a variety of different stalls without having to pay postage and I can feel the quality of fabric before I buy.

I always intend to take lots of photos of all the stalls as I go round the shows, but once I’m in I get far too distracted and forget! But I thought I would share some photos of some of my purchases from the day:

© 2016 Jennifer Richardson

    1. I bought 6 coordinating fat quarters from the Favourite Fabrics stall in light green and grey. I always like to visit the Favourite Fabrics stall to look at their fat quarters as they normally have a deal of 6 fat quarters for £10 and on this visit these 6 jumped out at me. I made a quilt for my niece using 6 fat quarters I had previously bought from Favourite Fabrics so I intend to do something similar with these.

    2. Floral cotton voile from Abakhan. I intend to make a little pair of trousers from this for my niece using Simplicity 1624 from which I have just finished the ruffle dress.

    3. Pink bird fabric from Fabrics Galore. This is a fabric I spotted when I was at Knit & Stitch in Harrogate back in November that I liked, but talked myself out of buying. But when I visited the Fabrics Galore stand last weekend it was sat right on top of everything just looking straight at me so I decided that it was meant to be and bought 1.5 metres of it for making some sort of blouse. It is 100% polyester and I am a little worried it won’t breathe particularly well so I think I might do something sleevless. I did think it would probably make a good lining for something, but I want to make it into a top! It is a slight crinkly texture to it a bit like a crepe.
I also bought a purple Frixion pen…I already have 2 black ones, but couldn’t resist the purple. I got terribly excited when I discovered these pens that allow you to draw on fabric and then the ink magically disappears when you pass an iron over the top! I think my only other purchase was a couple of packs of blank cards from a stall in the Hobbycraft show that sell packs of blank cards for £2.

I thought I was reasonably restrained on this visit to Sewing For Pleasure. Mum and I love looking through all the sewing patterns on the Simplicity and McCalls stands, but I didn’t even buy a single one! That is, however, partly because I had just received 2 new patterns in the post that I had bought from Weaver Dee along with a smooth tracing wheel, a ball point twin needle, a pack of top stitch needles for doing free machine embroidery and 4 spools of Moon thread for my overlocker! You do get free P&P if you spend over £10 afterall!


© 2016 Jennifer Richardson


Friday, 26 February 2016

Little Black Dress – Burda 6829

I made this dress before Christmas, but hadn’t gotten around to posting it. This was my first dress using stretch fabric! I bought some black knit fabric on Leicester market a while back that has been sitting in a box waiting to be used along with Burda’s 6829 pattern that I bought with the fabric in mind.

© 2016 Jennifer Richardson

I made it with long sleeves, but the length of view A and I straightened the hem of the underneath panel so that just the top layer swooshes up as I thought it would make it a little less evening-y. And I'm pretty pleased with it!

The fabric was quite easy to work with and thankfully I didn’t have to do much in the way of unpicking as trying to unpick black stitches on a black knit was a little tricky!

When sewing with woven fabrics your finished garment measurements should be larger than your body measurements (referred to as positive ease) to allow breathing room to move around and sit down. In contrast, stretch fabrics have more give in them so to make a garment that is close fitting with stretch fabrics the finished garment measurements should be smaller than your body measurements, which is referred to as negative ease. My bust and waist measurements put me at a size 14. The finished garment measurements for this size were only ½” smaller than my measurements, which I didn’t think was a lot and I wanted my dress to fit snuggly. So I decided to cut the size 12 instead. My hip measurements put me at a size 18…yes I am pear shaped! So when tracing the pattern I graded out from a size 12 at the waist to size 18 on the hip. I didn’t go down a size on the hip as I didn’t want it to be too clingy in that area.

Before I started sewing any seams, I overlocked all my edges. When sewing the seams I used the stretch stitch zig zag that looks like a lightning bolt. I did buy a ballpoint needle…but I forgot to use it! I don’t think my seams suffered too much for it though. All the hems were finished using a twin needle.

© 2016 Jennifer Richardson

What I liked about this pattern:
  • Pretty quick and reasonably straight forward so would agree with the pattern difficulty level being classed as easy.
  • I didn’t really have to make any fit adjustments. Using stretch fabric is more forgiving in this respect I think. However, I don’t think the bust dart is in quite the right place, but it is too noticeable with the black fabric. And having worn it a couple of times now I do think I might have to widen the shoulders slightly as I don’t think they’re sitting quite right.
  • There was no faffing around with zips or buttons.

What I didn’t like:
  • The instructions are not as linear as I would like. Step 1, for example, states that the hems should be finished with a twin needle, but it didn’t really specify whether you needed to do all the hems at the start or not. The top panel certainly needed hemming before sewing the seams. So you need to read the pattern through at least once before you start, which I guess is good practice anyway. Because of this I don’t think I did things in the exact order of the pattern.

Would I make this pattern again?:

  • Yes, definitely. I think I could make it quicker a second time round. The dress is very comfy and I can picture it in some different colours. 


Friday, 19 February 2016

To infinity & beyond! Silk infinity scarf.

A few months ago my mother-in-law Aileen gave me some beautiful silk fabric in 2 different designs…there was metres of the stuff and I was more than delighted to take ownership of it!

Aileen thought that the lighter-weight of the 2 fabrics would make beautiful scarves and she was after an infinity type scarf that she could wear a bit like a necklace with a jumper and with no ends to get in the way. So I thought I would try and make her one for Christmas.

I found a few tutorials for making infinity scarves via Pinterest and roughly followed this one from the I Heart Nap Time blog. Mine took somewhat longer than 20mins though!

This was the first time I’d sewn with silk. I knew silk can be a little tricky, but I thought “hey, how hard can it be?” Well, I learnt that it can indeed be pretty tricky! I needed to cut a long narrow rectangle to make the infinity scarf, but it was sooooooo hard to cut the fabric straight as it kept moving all over the place! I tried to do some research into how I could prevent this. One suggestion was to use a fabric stabiliser, but that would have meant ordering some and waiting for it to arrive and I didn’t have time for that (though I’ve since read that you can use gelatine!). So the other suggestion was to cut the fabric between layers of tissue paper. This did help and I eventually managed to cut out a roughly rectangular shape measuring approximately 30inches by 15inches for making a single loop infinity scarf.

Cutting out was by far the hardest part. So I decided to make the scarves from a single piece of fabric to minimise the amount of cutting out and to reduce the number of seams due to the delicate fabric. The silk did fray quite badly as well and as the fabric has a slight transparency to it I decided to use a French seam for the long seam. To do this:
  1. Fold the fabric rectangle in half length-ways with wrong sides together. 
  2. Stitch along the long seam approximately 0.5cm in (or half of your seam allowance) using a fine needle. This creates a tube of fabric.
  3. Turn the tube of fabric inside out so that right sides are now together. Press along the long seam before stitching along the long seam again approximately 0.5cm in (or half of your seam allowance) ensuring that the rough edges of the first seam will be encased by the next seam thereby hiding the rough edges. 
  4. Turn the fabric tube inside out again so that right sides are facing out and press.
To close the loop I matched up the 2 ends of the long seam and pinned together. It was not possible to use a French seam to close the loop so instead I used my overlocker to sew the 2 ends together as far round as I could, leaving a small opening which I then hand stitched closed.

My machine handled the silk well and I didn’t find it moved about at all really. Overall I was pretty happy with the result and once I made one I was able to churn out a couple more for presents much quicker.

© 2016 Jennifer Richardson

Thursday, 4 February 2016

“I make things with my bear hands” Emmeline Tee

When I drew my friend Jen in our work secret Santa draw my immediate reaction was “YEEEEEEEEESSSSSSSS”. Jen is a fellow crafter and my initial thought was that she would be easy to buy a gift for. But then when I thought about it I realised I wanted to make sure I did something really good. I knew she would be more than happy if I just bought her some fabric, but at the end of the day that wouldn’t require much effort and she can buy herself fabric anytime. So I started thinking of what else I could do. Jen is known as ‘The Bear’. I remembered a t-shirt I had seen in Asda ages ago that had a bear on it holding tools and it read ‘I fix things with my bear hands’. And it got me thinking whether I could make her a similar t-shirt, but craft themed to read ‘I make things with my bear hands’ instead. Of course I decided that I couldn’t just buy a plain t-shirt to print on, but instead needed to make one from scratch.

I love The Little Tailoress blog and had been looking for an excuse to purchase the Emmeline Tee pattern for some time, but had been trying to resist as I have so many sewing patterns that I have yet to do anything with. But I felt making a t-shirt for Jen gave me the perfect excuse to add this pattern to my collection.

I purchased the PDF version of the pattern. PDF patterns can be a faff to stick together, but then so is tracing a paper pattern, which I try to make myself do so I always have the original to go back to. I do quite like PDF patterns for the reason that you always have a permanent copy that you can print as many times as you like. So if you need a different size, ruin a copy, or want to make any modifications you can just print another copy. Plus, in printing on paper your pattern is more robust than tracing paper.

The Emmeline Tee pattern includes 3 versions all of which can be made in woven or knit fabrics, detailed instructions for which are included. I decided to make version 3 using a grey marl t-shirt jersey I picked up from Lili Fabrics stand at the Stitching, Sewing & Hobbycrafts show at the NEC, Birmingham in November.

Version 3 of the pattern only has 3 pattern pieces (front, back, and neckband). So it was super quick to cut out the fabric. I cut out a size S for Jen, but to the largest size on the hem to give a tiny bit of extra length in the body. When I come to make myself an Emmeline Tee I think I would want a bit more length in the body so will have to lengthen the pattern.

Following the instructions I started by overlocking all the raw edges of my pattern pieces. Then it was just a case of sewing up the side seams, attaching the neckband and finishing the hems and edges using a twin needle. The pattern is so clear and straightforward that it makes up in next to no time.

I enlisted the help of my husband Steve for the design to go on the front as he is very good at graphical stuff and design. So I told him what I wanted and he put it together for me.

Once the t-shirt was made up, next thing I had to try and figure out was how to get it printed. I did quite a lot of research into the various methods of printing. The cheapest is to buy an iron-on transfer. There are many websites that allow you to upload your own design and they will post you the transfer for you to iron onto your t-shirt yourself at home. However, I read that iron-on transfers aren’t really made to last and can perhaps only withstand 4-5 washes. I wanted Jen’s t-shirt to be more durable than this so I looked into other options. I decided that what I wanted was direct to garment printing so set about trying to find somewhere that would be willing to print on my own t-shirt rather than one of theirs. Fortunately I found ExampleUK who happen to be based just a couple of miles away from where I live. They were more than happy to do a one-off print using my design and t-shirt and I was so pleased with the result. I think it looks so professional.

I was soooooo excited about giving my secret Santa gift. I knew Jen would probably guess I was her secret Santa straight away, but I didn’t care as I was just dying to know what she thought of it and she loved it!

Here is the finished article:

© 2016 Jennifer Richardson
I am looking forward to making myself a few versions of the Emmeline Tee and already have fabric lines up to make about 3-4 different versions!


Monday, 9 November 2015

maps, maps, maps

We have a bit of an obsession with maps in our household.  We both did degrees in Geography followed by a masters in Geographical Information Systems so maps are a big part of what we do.  We have a number of framed maps hung on our walls along with various other map themed objects.  And, of course, whenever I see map fabric I really struggle to not buy some.


My latest map fabric purchase was bought in a fabric shop we stumbled across whilst staying in Kumamoto on a recent visit to Japan and is a half metre piece of heavyweight cotton with a Japanese style map on it:

Japanese map fabric from Kumamoto, Japan. © 2015 Jennifer Richardson


I haven’t decided what to use this bit of fabric for yet, but it will most likely be turned into a cushion cover as much of my other map fabric has been!

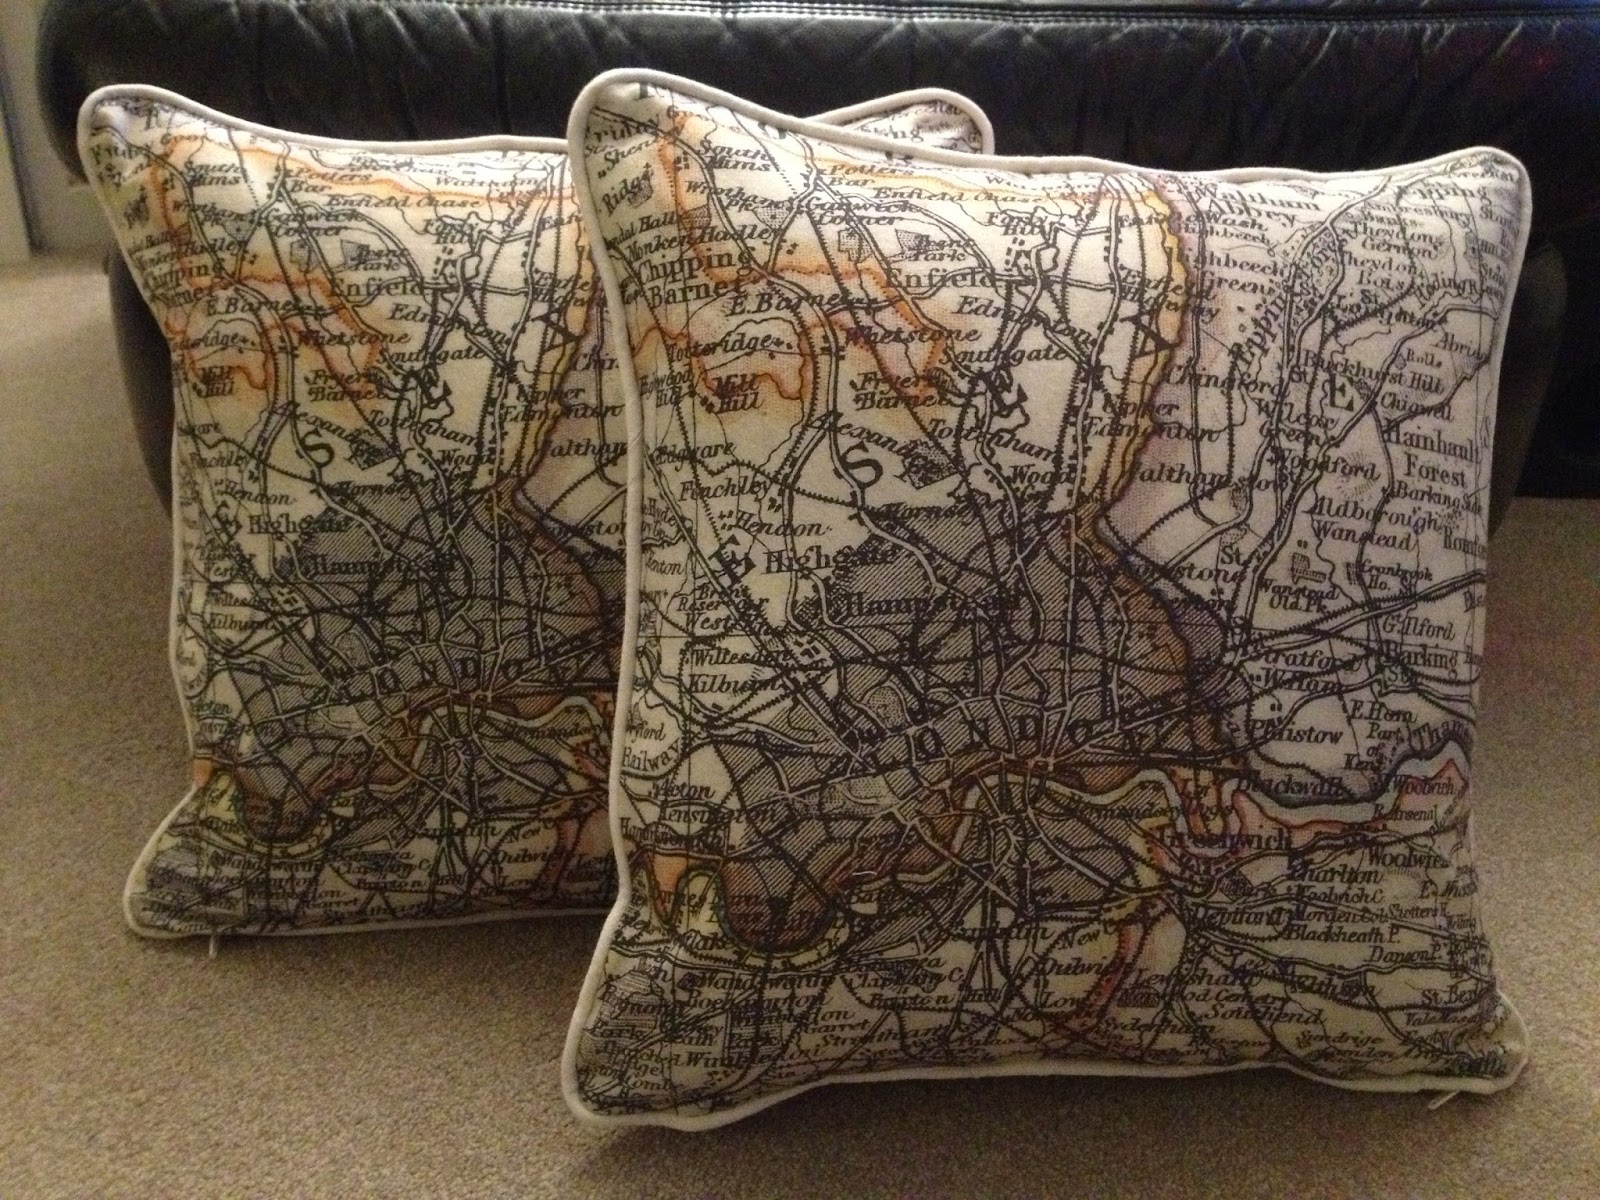
I made these cushions as a present for my younger brother and his fiancé who live in London using fabric I bought on Leicester market:

London map cushions. © 2015 Jennifer Richardson

These cushions were a housewarming present for a friend who is a fellow map fan:
Map cushions. © 2015 Jennifer Richardson

I also used some of the map fabric to redo the cushion pads on our dining room chairs:


Map seat cushion. © 2015 Jennifer Richardson
But by far my most favourite map themed project to date was to get some map fabric custom printed.  I came across Fingerprint at a craft show at the NEC in Birmingham a while ago.  What attracted me to their stand were the squares of map fabric printed using images from old atlases.  I just could not walk past that stand without taking a look and of course ended up buying a few squares which I made into cushion covers as a present for my older brother:
World map cushions. © 2015 Jennifer Richardson

London map cushions. © 2015 Jennifer Richardson

Whilst at the stand I ended up chatting to Laura Kemshall’s mum who told me about the custom printing.  Once I knew what I wanted, I contacted Laura and sent through my images.  Laura was really lovely to communicate with and I was absolutely delighted with my fabric when it arrived.  I had a half metre printed, which had 3 map squares on that I had lined up to make (yes, you guessed it) more cushion covers.  These were going to be special cushion covers though as my plan was to freehand embroider over some of the line work such as contours, rivers, main roads and stands of trees.  One of the cushions I then gave as a wedding present and the others (though I still haven’t finished the 3rd) were for my Mum for her 60th.  I was over-the-moon with the final result.  And I keep meaning to get more map fabric custom printed by Fingerprint!
Please note that if you are thinking about having any fabric custom printed then you need to make sure that any images you use are out of copyright.

Custom printed map cushion freehand machine embroidered. © 2015 Jennifer Richardson