 |
| © 2015 Jennifer Richardson |

Tuesday, 15 December 2015
Super Snuggly Baby Blanket
I was browsing Pinterest looking for ideas for something I could make for the arrival of my friends’ first baby and came across Mrs Brits’ Sweet and Chunky Baby Afghan crochet pattern here. This looked like just the thing I was after. Being in chunky yarn I knew it would crochet up quickly and the pattern is easy peasy so it was something I could mindlessly follow whilst sat watching something on the TV in the evenings. I loved the colours of the yarn Mrs Brits used for her blanket, which is what caught my eye in the first place, but I knew my friend was expecting a baby boy so wanted something more boy appropriate. The pattern uses Bernat Baby Blanket yarn, but this does not appear to be terribly easy to get in the UK. However there are sellers on Amazon and also eBay where I got mine. I wanted something a little bolder than typical baby colours so after much deliberation I ended up buying 2 balls of the Bernat Blanket Big Ball yarn in Sailors Delight. This is a multi-coloured yarn of blue, orange, brown and beige and is sooooo soft. The end result is a super snuggly blanket! I followed the pattern exactly using a 9mm crochet hook and my finished blanket roughly measured 30” wide and 36” tall. I think this may become a go to pattern for new arrival gifts!
Thursday, 10 December 2015
Alternative Christmas cards:
I’ve always wondered when I make handmade cards whether people hold on to them or whether they just end up in the recycling with the rest. Of course I don’t expect people to hang on to everything, but when you put effort into making things its sometimes hard to think that they may just find themselves in a bin. So, a few years ago I decided to make what I call ‘alternative’ Christmas cards in the hope that people would be more likely to hold on to them. My alternative cards are generally some form of tree decoration. Of course, not being flat means postage is more expensive as they generally have to be sent with large letter stamps, but I like thinking that all the people on my Christmas card list are essentially getting a small gift.
Over the past few years I have made felt Christmas puddings, felt Christmas trees, fabric presents, crochet stars, and knitted mini stockings. Here are a few examples of ones I’ve kept hold of for my own Christmas tree:
For this year’s cards I have been making fabric yoyo Christmas wreaths. I bought all the supplies from eBay. I’ve used red beads and the cutest mini red buttons to look like berries and red satin ribbon for the bows and hanging loop. I’m pretty pleased with how they have turned out so I hope their recipients will like them also.
Over the past few years I have made felt Christmas puddings, felt Christmas trees, fabric presents, crochet stars, and knitted mini stockings. Here are a few examples of ones I’ve kept hold of for my own Christmas tree:
 |
| © 2015 Jennifer Richardson |
 |
| © 2015 Jennifer Richardson |
Tuesday, 1 December 2015
Gift tutorial: Japanese paper pendant
This is a
quick and easy tutorial to make a Japanese paper pendant that can make use of
any scraps of paper left over from making my tea bag folding cards, the
tutorial for which can be found here. I have attached my pendants to keyrings,
which I think will make great stocking fillers for Christmas!
 |
| © 2015 Jennifer Richardson |
You will need:
- Pencil
- Scissors
- Silicone craft glue
- 1 X Cabochon setting (I am using a 25mm square antique bronze setting)
- 1 X Glass cabochon (I’m using a 25mm X 25mm X 7mm transparent square)
- A scrap piece of Japanese paper (at least big enough to fit your setting)
- Cord/key ring fob to hang pendant from (I’m using an antique bronze key ring fob)
- Take your scrap piece of Japanese paper and place your glass cabochon on top of it and move it around to find a section of the paper you particularly like. I am using a 25mm X 25mm X 7mm transparent square glass cabochon to fit a 25mm square setting.
- Holding the glass cabochon in place with one finger, take your pencil and draw around the cabochon.
- Using your scissors, cut out following your pencil outline giving you a piece of paper that should fit your cabochon setting.
- Spread a thin layer of silicone craft glue to the inside of your cabochon setting.
- Place your piece of paper into the setting right side up. Press down lightly to make sure the paper has stuck and there are no creases or air bubbles. Here I am using a 25mm square antique bronze setting, but you can use any shape, size or colour. It doesn’t have to be a pendant setting. You may wish to make earrings or cuff links instead.
- Give the back (flat side) of your glass cabochon a polish to remove any finger prints and apply a thin layer of silicone craft glue. Place the glass cabochon into the setting on top of the paper and press down to remove any air bubbles. Polish the top side of your cabochon.
- I have attached my Japanese paper pendant to an antique bronze key ring fob matching my cabochon setting. To do this I used a pair of pliers to open the jump ring at the end of the key ring chain and fed this through the loop of the pendant then used the pliers to close the jump ring again. If you want to wear the pendant as a necklace, however, you may wish to thread a piece of cord through the pendant loop instead.
 |
| © 2015 Jennifer Richardson |
 |
| © 2015 Jennifer Richardson |
Tuesday, 24 November 2015
Bundles of Beetroot
A few weeks ago my Dad gave me a load of his home grown
beetroot. I love beetroot, but being the
only beetroot fan in the house I would never have gotten through it all if I’d
pickled it and kept it for myself and there was far too much to try and use it
in chocolate cakes, which is my other favourite thing to do with beetroot. So I scoured the web for a beetroot chutney
recipe I liked the look of. In the end I
decided to roughly follow this one on the BBC Good Food website.
I had more than 1.5kg of beetroot though so decided to use
approximately 1.5 times the ingredients.
I thought processing that quantity of beetroot would leave the kitchen
looking like a murder scene! However, by
peeling the beetroot into a colander in a basin of water in the sink wearing
disposable gloves and using Maggie the Magimix to chop everything I actually
kept things reasonably tidy. What I
didn’t factor in though was what the volume of the ingredients would be in
increasing the ingredient quantities! I
started of using the large stainless steel pan I usually use for making jams
and chutneys, but it soon became apparent that the pan was going to end up a
little too full! The only thing I had
that was bigger was my enamel-lined cast iron Le Creuset casserole dish. I had to use Google to find out if it was OK
to use that, which thankfully it looked like it was so I tipped everything into
that instead. This also gave me an
opportunity to use the giant wooden spoon and spatula for jam and chutney
making that my Mum had given me for my birthday.
Whilst the chutney was bubbling away I sterilised the
jars. To do this I washed the jars and
lids in hot soapy water and then put them in the oven pre-heated to 140⁰C. They need to stay in there for at least 15mins,
but I tend to leave them in longer until I’m ready to use them.
Once the chutney was ready, I took the jars out of the oven
and spooned the chutney in. I managed to
fill 14 jars, which was nearly my entire supply of spare jars! As I can’t eat that much chutney I will be
coming some away as Christmas presents.
I bought some dissolvable labels on EBay to label up the jars and used
some squares of Christmas fabric to cover the lids.
 |
| © 2015 Jennifer Richardson |
And after all that I still had 2 giant beetroots left, one
of which found its way into a chocolate and beetroot loaf and the other I
cooked in the microwave and ate!
Thursday, 19 November 2015
Card making tutorial: Tea bag folding with Japanese paper
You will need:
- Cutting mat
- Ruler
- Pencil
- Scalpel/scissors
- Glue stick
- 15cm X 15cm blank card
- 15cm X 15cm piece of patterned paper
- 5cm X 15cm piece of complimenting patterned paper
- 6cm X 15cm piece and 9cm X 9cm piece of coordinating coloured card
- Take the 15cm X 15cm patterned piece of paper. Here I am using Japanese paper, which works really well for this, but you can use any patterned paper.
- Using a pencil and a ruler draw a grid 5cm X 5cm squares on the back.
- Carefully cut along the grid lines using a scalpel or pair of scissors. You will have 9 squares.
- For each 5cm X 5cm square: With wrong-side facing up, fold the paper in half, open out and fold in half the other way. Turn the paper over so the right-side is facing up and fold in half diagonally once and open out. Turn the paper over again so wrong-side is facing up and push the diagonal folds in and up to create a folded 2.5cm X 2.5cm square.
- Once you have folded all 8 squares, using a glue stick start to slot one square inside another to create an eight-pointed star as shown below.
- Using the glue stick, stick your eight-pointed star to the 9cm X 9cm piece of coloured card (I’ve used a golden yellow) and carefully cut around the points of the star using a scalpel or scissors to create a border approximately 0.5cm wide.
- Next cut a 5cm X 15cm piece of coordinating patterned paper and a 6cm X 15cm piece of the same coloured card you used to back the eight-point star.
- Stick the piece of patterned paper to the coloured card using a glue stick so that you have a 0.5cm border down the long sides.
- Apply glue to the back of the coloured card and position it on your blank card where you want it to be (I positioned mine approximately 2cm in from the folded edge.)
- 1. Finally, stick the eight-pointed star to the front of the blank card positioning it half way between the top and the bottom and so the top and bottom points are lined up with the edge of the coloured card.I finished my card off in keeping with a Japanese theme using some Japanese Mizuhiki paper cord to tie a clamshell knot (or Daki Musubi in Japanese) which I glued to the centre of my star. This image posted on Paper Wishes illustrates how to do this.
 |
| © 2015 Jennifer Richardson |
 |
| © 2015 Jennifer Richardson |
 |
| © 2015 Jennifer Richardson |
 |
| © 2015 Jennifer Richardson |
Monday, 9 November 2015
maps, maps, maps
We have a bit of an obsession with maps in our
household. We both did degrees in
Geography followed by a masters in Geographical Information Systems so maps are
a big part of what we do. We have a
number of framed maps hung on our walls along with various other map themed
objects. And, of course, whenever I see
map fabric I really struggle to not buy some.
My latest map fabric purchase was bought in a fabric shop we
stumbled across whilst staying in Kumamoto on a recent visit to Japan and is a
half metre piece of heavyweight cotton with a Japanese style map on it:
 |
| Japanese map fabric from Kumamoto, Japan. © 2015 Jennifer Richardson |
I haven’t decided what to use this bit of fabric for yet,
but it will most likely be turned into a cushion cover as much of my other map
fabric has been!
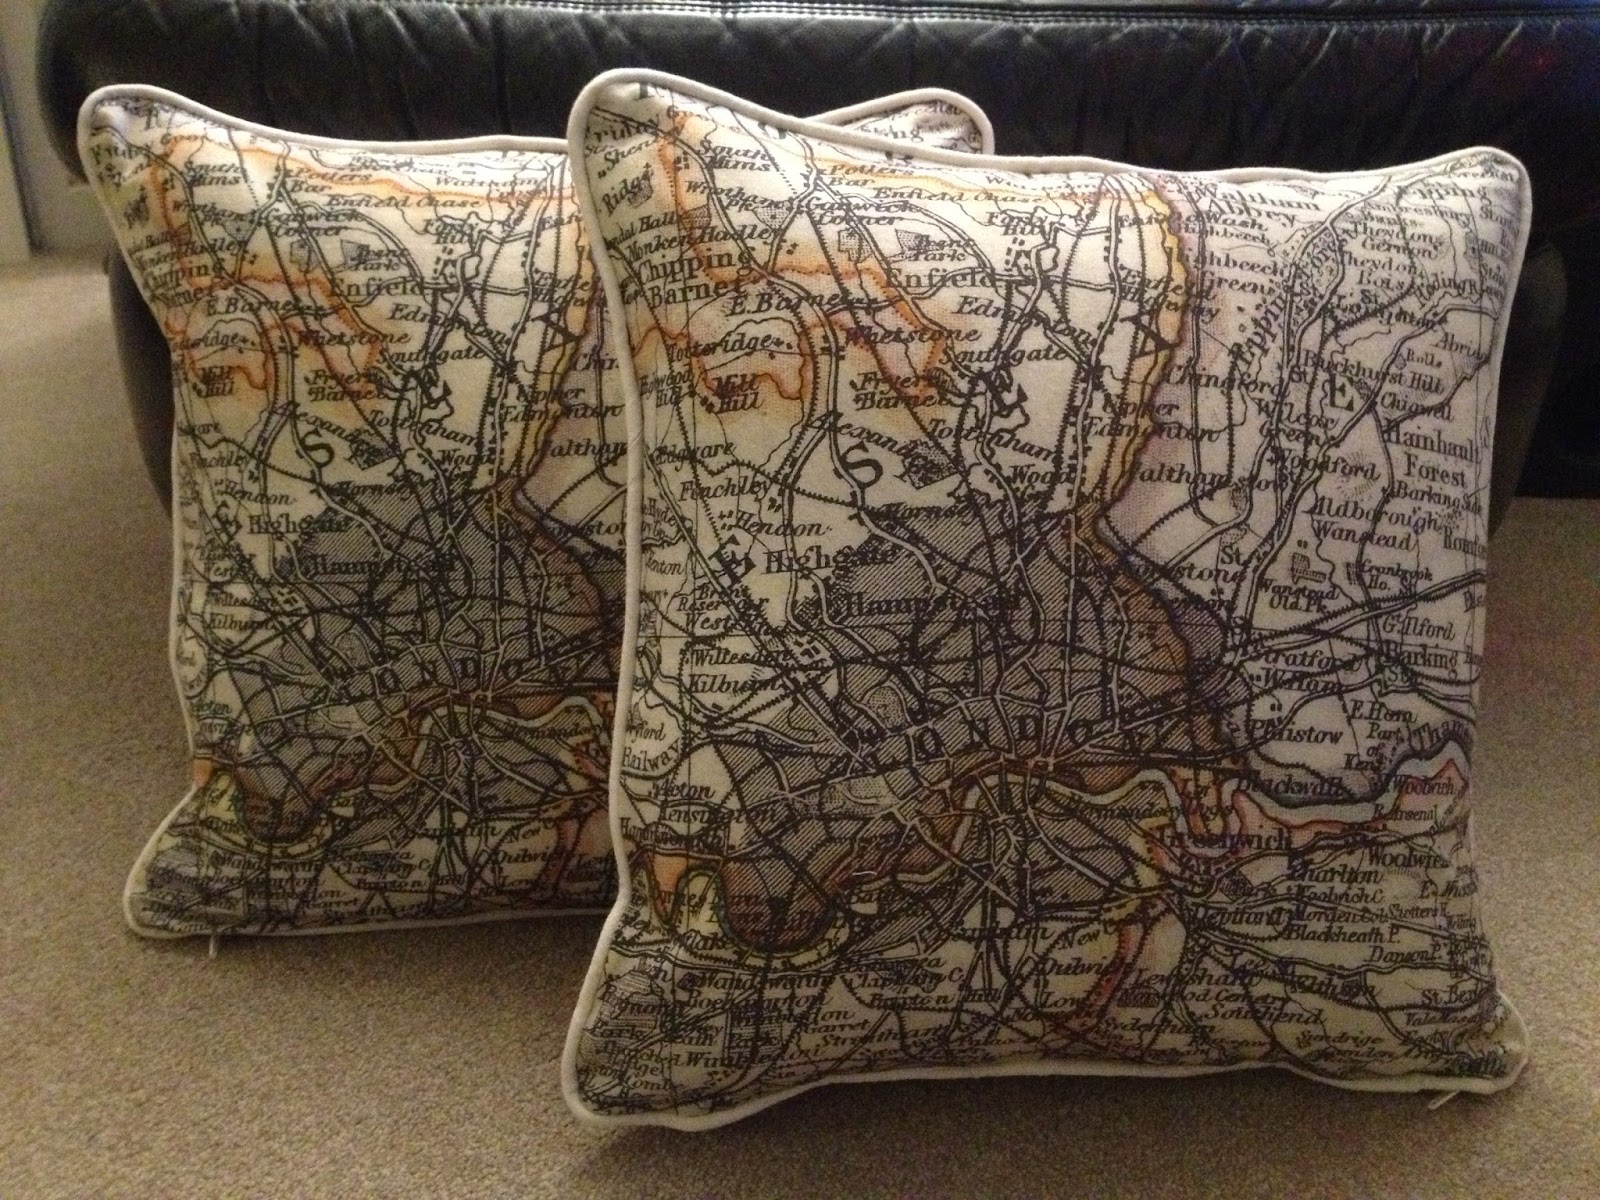
I made these cushions as a present for my younger brother
and his fiancé who live in London using fabric I bought on Leicester market:
 |
| London map cushions. © 2015 Jennifer Richardson |
These cushions were a housewarming present for a friend who
is a fellow map fan:
 |
| Map cushions. © 2015 Jennifer Richardson |
I also used some of the map fabric to redo the cushion pads
on our dining room chairs:
 |
| Map seat cushion. © 2015 Jennifer Richardson |
But by far my most favourite map themed project to date was
to get some map fabric custom printed. I
came across Fingerprint at a craft show at the NEC in Birmingham a while ago. What attracted me to their stand were the
squares of map fabric printed using images from old atlases. I just could not walk past that stand without
taking a look and of course ended up buying a few squares which I made into
cushion covers as a present for my older brother:
 |
| World map cushions. © 2015 Jennifer Richardson |
 |
| London map cushions. © 2015 Jennifer Richardson |
Whilst at the stand I ended up chatting to Laura Kemshall’s
mum who told me about the custom printing.
Once I knew what I wanted, I contacted Laura and sent through my
images. Laura was really lovely to
communicate with and I was absolutely delighted with my fabric when it
arrived. I had a half metre printed,
which had 3 map squares on that I had lined up to make (yes, you guessed it)
more cushion covers. These were going to
be special cushion covers though as my plan was to freehand embroider over some
of the line work such as contours, rivers, main roads and stands of trees. One of the cushions I then gave as a wedding
present and the others (though I still haven’t finished the 3rd)
were for my Mum for her 60th.
I was over-the-moon with the final result. And I keep meaning to get more map fabric
custom printed by Fingerprint!
Please note that if you are thinking about having any fabric
custom printed then you need to make sure that any images you use are out of
copyright.
 |
| Custom printed map cushion freehand machine embroidered. © 2015 Jennifer Richardson |
Subscribe to:
Comments (Atom)